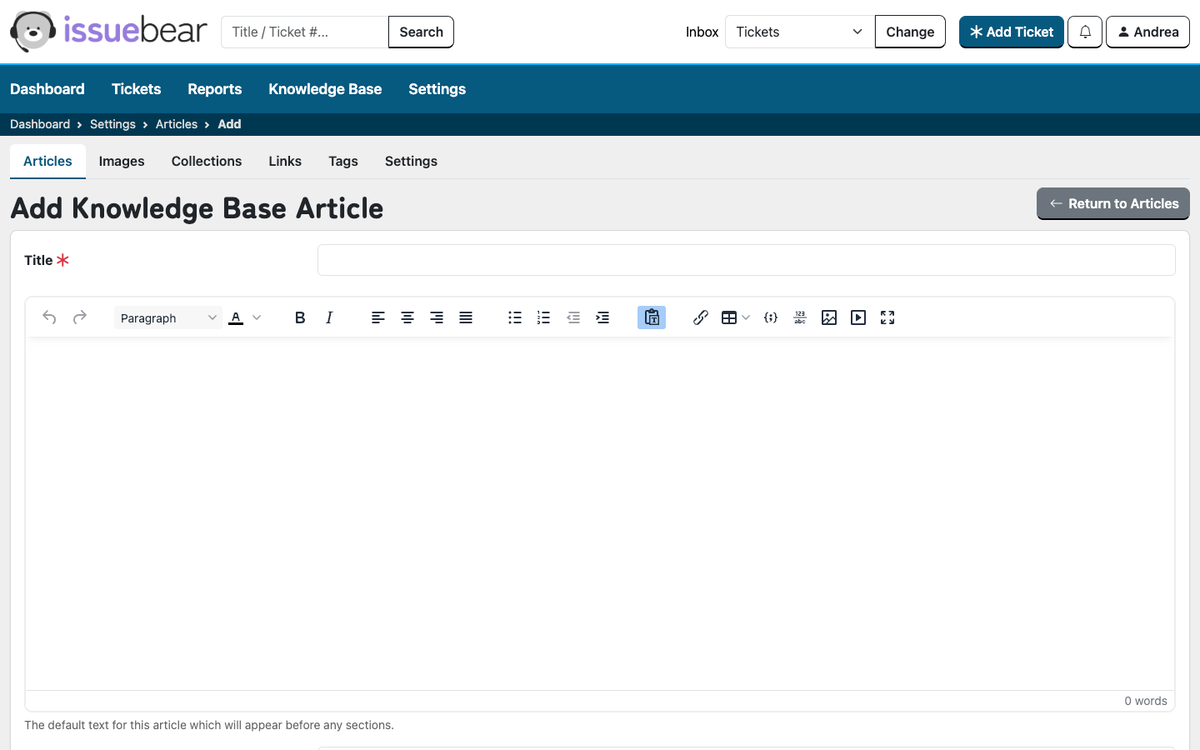
An article is a single document, to add an article select the Articles tab from the top of the Knowledge Base page, then use the Add Knowledge Base Article button. 
Adding an Article is straightforward:
Title: Give your article a name, being as clear as you can about its content this will help you and your customer to find it in future.
Main Body of the Article: You can now add in the main body of text to the article using the WYSIWYG editor, which means the text you see in the editor is exactly how the final article will look. You can draw tables, insert images, link to external sources and use a whole host of other content formatting features. 
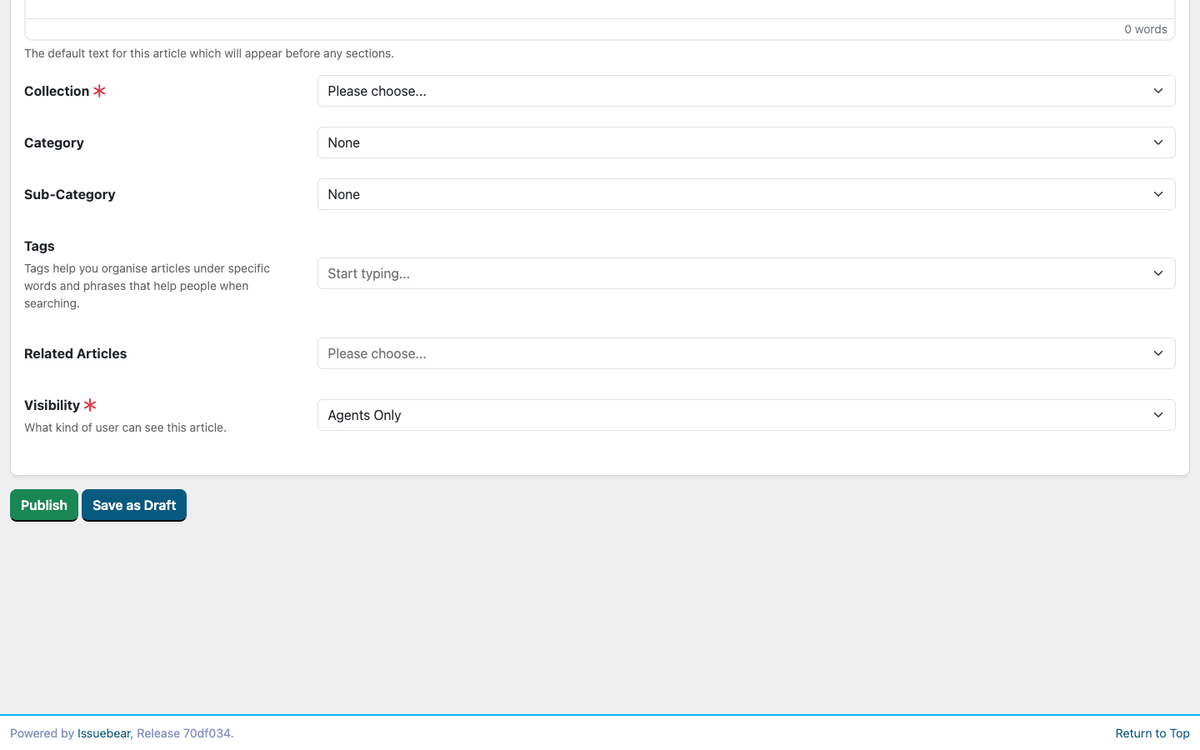
Collection: You must assign all articles to a Collection. You can select which one from the already created collections here.
Category: You can assign any articles you create to a category. This grouping makes it easier to check for related articles.
Sub-Category: You can assign any articles you create to a sub-category within a category to make it easier to find related grouping of articles.
Tags: Use tags to assign additional words or phrases to an article which make it easier for people to find it via the search. Or use tags to group related concepts together.
Related Articles: This allows you to link separate articles that give further insight on the topic. This is a dropdown menu and will bring up all the articles you have created simply choose the one you want to link. You can also link multiple related articles in the same way. You can also remove the link between articles by clicking the x on the article that you want to remove.
Visibility: This determines who can see the article.
- Agents Only if it's an article that only Agents should be able to view.
- Agents & Ticket Hub Users allows all Agents and Customers with a login to your Hub to see the article.
- Agents, Ticket Hub Users & Public which allows anyone to see the article, either logged into your hub or on your public portal.